Thursday, 3 December 2015

Pitch to Media Matt

Today we pitched our idea to Matt (one of our media producer) in which he suggests and decides whether we will be able to shoot the sequence or not.

Feedback

Matt liked the idea overall especially the answer phone messages in the background and the whole sequence being filmed in one-take. However, Matt said that some of the ideas will be really hard to shoot, for example the long path tracking shot as it will be very time consuming as we only have one day to shoot. Matt suggested that we could attempt with the best image stabilization equipment we could find as long as we have a story board ready in case we decide to shoot the whole house mise-en-scene in a sequence. He also told us that we need to do a lot of preparation in order to fit all of the shots in the actual shoot day as we need it keep it within one day. The photographs, broken mirror, red paint splattered in dusk sheet have to be ready before the shooting day which will make our shooting time as efficient as possible.

'Scarlet' Brand New Thriller Idea

Today me and my group came up with a totally new idea for our thriller opening sequence.
I made this presentation so me and my group has the overall idea of what the new idea is about.
I came up with the name "Scarlett" which symbolises the colour 'scarlet' (blood), this will work perfectly with the final gruesome murder scene as it will have blood splattered everywhere.


Thursday, 26 November 2015

Group Thriller Ideas

Today I had been grouped up with 3 other students from the class; Lauren, Genny and Jonty; to work together for the next few weeks to produce our own thriller opening sequence. First we discussed on whose idea to use as it is very vital to choose something we will enjoy editing and filming in the future and that it is something that is actually good. We couldn't choose between anyone's idea so we decided to kind of merge all of our ideas together where the opening sequence contains bits and pieces of each of the ideas in it. The plot that we came up with is basically a mentally unstable boy who lives in a boarding house with a roommate whose kind of a popular and cool kid. The room will be half decorated as being very childish for the mentally unstable boy and the other half will be decorated as the typical teenage boy room, with poster of girls and cars and those sort of stuff. The plot is just basically the mentally unstable boy is trying to find various different ways to kill his roommate. We thought of the ideas of having flashes and shutters between the mental state of the boy plotting to kill his roommate and the reality state of him just doing normal daily routine. This means that we could combine scene from inside the dorm room with the scene outside the dorm room, for example, there could be a wide shot of the mentally unstable boy casually walking down the corridor with books in his arms- this could flash to the same boy carrying the dead body of his roommate in the woods in the same scene. We have many different ideas for this type of editing, here are some of the ideas we came up with: Close-up shot of the boy scooping cereal from a bowl with a spoon- flashes to the boy digging the shovel into the mud, close-up shot of the milk splattered on the lens flashes to the mud filling up the lens as the boy started burying the body, Close-up shot of roommate's face sleeping in the dorm room flashes to the close-up shot of the roommate's face covered in blood while being buried and finally a wide-shot of the boy dancing to the song 'September' alone in his room flashes to the boy dancing to the same song around the dead body to create contrapuntal sound effects. The opening sequence would end with the lens being totally covered in mud and the sequence blacks out, showing the title of the sequence afterwards.

Feedback for Thriller Ideas

Image result for scary clown maskToday we shared our own individual's thriller opening idea with the class. I presented my idea and got some really useful feedback from Katie and my classmates. Firstly I wont be able to use a clown mask because its way too mainstream and our main producer, Matt, isn't particularly a fan of clowns either. The shot may not be able to shoot realistically as we need a dead body which is pretty hard to find a prop that will look super realistic. However, there were also some positive feedback such as the camera angle i decided to use in the car's trunk as it works nicely to create tension. Also the idea was quite simple and straightforward which will be an advantage when it comes down to shooting the actual opening sequence and editing them.

Thursday, 22 October 2015

Analysis of Video Sequence

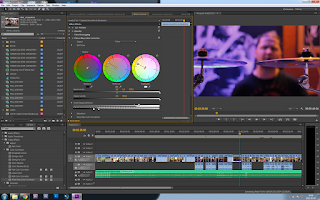
We edited the sequence using Adobe Premiere, experimented around it so that it consists of many different camera shots, angles and movement. We also added post production sound after we finished filming.

We started off with a close up shot of character B's finger on the keyboard. This gives a good representation of what the character is doing and gives a clear idea to the audience of what is happening on the scene. We then switched to a long shot of character A about to enter the room. This gives the audience the feeling of control as they see character A before the character B sees him. We also did many close up shots of the character's face. This is to highlight the emotion of the characters and gives the audience the connection with the character.

We also included over the shoulder shots. This shot gives the audience the feeling of being in the actual conversation in the scene as it puts them into the character's position- sees and hear what the character is experiencing. Wide shots are self explanatory. We included it to show the audience the overview of the surroundings and what is going on in the scene.

We added the post production sound of the fart noise during the editing. This is to emphasis the 'pull my finger' joke that we decided to add into the scene, just to make it more fun and less boring. The sound was added using Adobe Premiere after the shots were put together.

I think we have been quite successful with editing and filming these sequences despite some little continuity issues. I learned many key skills from this lesson such as how to edit videos, add sounds, cut from frame to frame, basic use of cameras, being a director and overall it was a really useful and amazing experience.

However, for next time I would pay more attention to continuity as it can be a big issue in the bigger production.

Studio Lesson- Video


Sunday, 18 October 2015

Use of Sound in Thriller/Horror Movies

In most thriller and horror films, sounds are used to build up tension and suspense as well as mysteriousness to the audience to make them feel curious, scared and frightened to what may come next in the scene. The music usually indicates that the climax/jump scares in horror movies is about to happen. For example:

The Insidious franchise. The music really builds up the tension and mysteriousness of the scene. Every time when a ghost is about to appear or the character is about to face something really frightening, the non-diegetic sound of sharp violins and strings are played to build up tension. Also, silence works really well in horror films as it makes the audience unaware of anything that is about to happen. They also use a lot of pleonastic sound to exaggerate and build up tension such as footsteps and door creaking. This creates a really good effect to the audience as the producer may include fake jumpscares by building up the sound to make the audience really scared but then discovered that nothing scary is happening in that scene at all.

Studio Lesson- Filming a sequence

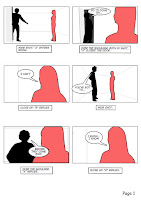
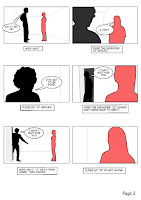
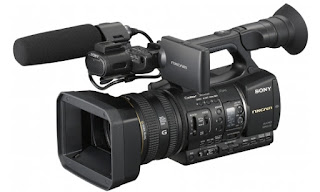
In this lesson, we were divided in 3 groups of 4, each one assigned to a particular job: 2 actors, 1 camera man and 1 director. We were set to film a short sequence following a script (a story board) that we were given to while choosing our own setting and create our own scene. We used the Sony NX5 as the camera and it produces really good quality shots.

I was the director in this lesson. I learned the process that the director has to do before every shots is being filmed- for example: stand by, camera roll, action and cut. I also had to decide the angles for each shot to maximise the full effect of each scene. We also experimented to try and shoot outside the storyboard by trying to shoot little details such as footsteps or close up of the character typing and etc. I also made sure that we stuck to the 180 degrees rule to prevent the scene from being messy.

Development for thriller opening sequence

Thriller elements- Suspense, tension, crime, mysteries, physical actions, fights, murders, unsolved events, scary, usually involve blood and violence.

Thriller movies- Kill Bill, The Purge, Dead Silence, Saw, Sherlock Holmes, Shawshank Redemption, The Dark Knight Rises, Fight Club, Shutter Island.

Plot of the opening sequence: A psycho serial killer wearing a scary clown mask walking towards his car while dragging a dead body, put the body in the trunk and drove off.

The walking scene could be a shot of his feet walking on the small pebble rocks which creates some really interesting sound- the camera moves along with the footsteps. The scene then slowly fade cut every time the shot changes. The second shot my show his hand holding on to someone's leg and slowly pan down to reveal a whole dead body. When the killer gets to the car, he open the trunk and throw the dead body inside. This shot could be done by putting the camera inside the trunk and when the body is inside and the killer closes the trunk, it blacks out. The killer then open the door and sit on the driving seat. He took off his mask. After that, he adjust the driving seat's mirror which only shows a corner of his eyes with a scar on his face. Blacks out.

All of this could be shot in our school, using the space of the lower carpark which gives the isolated- forest kind of feelings.

Thursday, 15 October 2015

Thriller Sub-genres

Action Thriller
This type of thriller usually involve guns, violence and explosions. Usually have aspects of crime and mystery,but usually set in a limited space/one location. Plot usually involve a threat by enemy which is then saved by one hero who fights his way through the film in order to defeat the enemy.
Conspiracy Thriller
The character usually sees a secret about an organisation and defeat them alone as nobody is on his side
 Crime Thriller
Focuses on crime- either criminal or police's point of view. The ending is usually about the criminal being arrested or the mystery being unsolved by the detective.
Disaster Thriller
Usually about a natural disaster, the character tries to stop the incident and save the world.
Eco-Thriller
The character tries to stop the environment being damaged- the damage could be local or national depending on the plot.
Forensic Thriller
The characters are forensic scientists who needs to solve mysteries in order to keep themselves from getting killed.
Legal Thriller
This usually takes place in a court room- the character coud be a lawyer or victim who's trying to save someone's life or avoid being killed.
Medical Thriller
Usually about viruses which were leaked by the doctors. The main character is usually a doctor that tries to cure the disease.
Mystery Thriller
Involves mysteries and thrillers. Usually fast-paced and involves unsolved accidents that the character must pursue.
Psychological Thriller
Involves conflicts in mental state not physical. Usually involves a lot of psychopaths and problems inside the character's head that challenges their sanity.
Religious Thriller
Uses myths and facts about religion in the history.
Romantic Thriller
Basically a thriller which involves a lot of actions and fightings while creating a relationship between two characters.
Supernatural Thriller
Involves supernatural characters and powers which is not likely to happen in realistic thrillers. Usually involves zombies or ghost in the plot.
Techno-Thriller

Cross between futuristic science fiction and thriller. Usually involves high-tech equipments as well as characters.

Tuesday, 6 October 2015

Studio Lesson- Editing


In this lesson, we were introduced to editing sequences using Adobe Premiere.
We learned how to cut, organize, duplicate and store files in their corresponding project bin. We edited the sequences we shot in lesson 2 and put them all into one continuous scene with many different angle shots. We were also showed the audio and video functions and how to use them effectively. We acquired the basics of editing skills in just one lesson which I think personally, is pretty amazing..


Camera Shots, Angles and Movements

Camera Angles:

Establishing shots- to establish settings or scene to the audience.


Extreme long shots- to show the surroundings in more detail of the character.


Long shots- a full body shot, used to see everything in the scene.


Mid long shots- usually from thigh upwards (American angle)


Mid shots- usually from waist upwards.


Close-up shots- sometimes include shoulder and face, used to focus details on character's face.


Extreme close-up shots- focusing on character's specific details.


High angle shots- status shot, used to make the character seems small and obedience.


Low angle shots- status shot, used to make audience feels inferior.


High vs Low shots- status shot, interchanging between high n low characters.


Point of view shots- shots from character's point of view.


Over the shoulder shots- shots from over the character's shoulders, usually used in conversations.


Canted angle shots- for the audience to feel disoriented and uneasy.


Camera Movement:


Panning: Moving the camera lens from one part of the frame to the other.
Zoom: Changing vocal length to make the subject in the frame appear closer or further away.
Tilt: Moving the camera up and down while keeping it constant horizontally.
Track: Moving the camera forward, backwards, left, right while keeping the focus on the subject.
Hand-held: Moving the camera in a more mobile movement to make the audience feels as if they were in the action of the scene.


Studio Lesson- Camera Introduction


In this studio lesson, we were introduced to 3 cameras and learned how to operate them as well as how to use the tripods and how to focus each shots in different distance/angles.


The 3 cameras were:

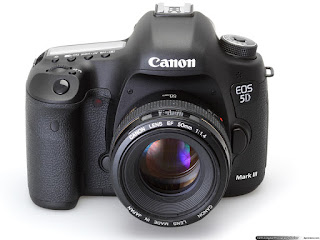
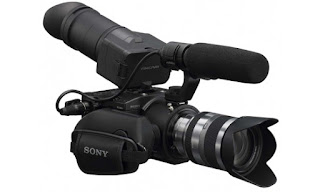
 Canon 5D- This camera has a fixed lens which means it cannot auto-focus and we focus by measuring the distance between the camera and the shot and adjust the lens to the appropriate distance in order for the lens to focus.


Sony FS100 - In order to focus with this camera, you need to zoom all the way into the shot, focus on that little spot and zoom out to the desire distance in order to make the whole scene focused.


Sony NX5- This works similar with Sony FS100, in order to focus the shot, you need to zoom in and focus and zoom out to make the whole scene focused.


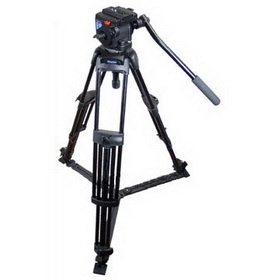
Vinten Tripod- The tripod is used to keep the camera in place as well as keep it steady throughout the scene. We can adjust the tripod to our desired height, place and lock the camera on top then bubble the tripod to make sure it is all balanced.


Friday, 25 September 2015

24/09/15 Studio Lesson


.
In this lesson, we learned some basic aspects of the 180 Degree Rule and filmed a couple of short sequences using the Canon 5D.

The 180 Degree rule is basically making sure that the camera always stay on one side of the shot (within 180 degrees) to prevent confusion to the audience on directions of the action and to prevent the scene from being totally random- the character that's on the right always stays on the right and the character that is on the left side stays on the left side

We filmed a couple of short sequences in our small groups. The first short sequence was just a simple sequence of a character walking into the scene, picked up the phone, checked the phone and simply walked out of the scene. We filmed this scene using many different shots such as: the wide shot, close up shot and behind the shoulder shot.

The second short sequence was a shot of a character who picked up a rose from the ground. sniffed it, tossed it in the bin and simply walked out of the scene. In this sequence, we filmed this scene using wide shot of the character walking in, close-up ground level shot of the rose being picked up, a close up shot of the character sniffing the rose, goes back to the ground level shot to see the character walking towards the bin, behind the shoulder shot of the character walking towards the bin, a close up shot of the rose being tossed in the bin and just a normal wide shot of the character walking out. This makes the sequence much more interesting and exciting than just a simple wide shot all the way through. We also used a marker to make sure that in all of the shots, the rose was in the same position therefore the shots are continuous.


Thursday, 24 September 2015

Saving Private Ryan Poster Analysis

‘Saving Private Ryan’ Poster Analysis


Firstly, the main focus of the poster is a faded portraits of 4 men in military uniforms. The iconography of these characters- green soldier hats, green soldier uniform, imply that this is a movie some sort of war. The faded effects created the feelings of 'memory' which may imply that all of these soldiers are just memories- they died somewhere in the movie. The middle soldier is staring right back to the audience which makes audience feels intimidated as it implies that he could be quite a tough and strong character in the movie. The soldier on the far right though, however, stares into the ground below him which may suggest that he is quite sad or something tragic happened to him in this film or he may not be as important as the middle guy. The background of the faded portraits is a beautiful scene of an orange sunset. This suggests that the ending of the movie might be a good and peaceful ending as the sunset often refers to peacefulness and calmness. It can also suggest that these characters will have to go through a lot of bad/tragic things in order to reach this sunset/peacefulness.

Also in the middle of the sunset, right in the centre of the poster; is a little black shadow of one soldier standing by, holding his rifle. facing into the sight of the sunset. This could imply that only one of the characters above have survived as there is only one shadow standing and the fact that he's staring into nowhere could suggest that all of his friends died and he could be reliving all the moments of him and his friends inside his head. This makes the audience interested and predict which one of the four from above will survive which grabs their attention and make them want to find out. It may also suggest that they have won the war as there is a survivor left standing in the middle of the sunset(which could suggest the end of war.)

Below the shadow, were the movie title and actors’ names and the production name. All the text were in white in contrast with the black background behind it to make it standout to the audience. Tom Hank’s name were written in bigger font above the movie title while the other actors’ names are below the title. This is because Tom Hank were in many other famous films which may have created reputations for the audiences and grabs attention of all the Tom Hank's fans to be interested in this movie.

The title of the movie were written in bigger font to make it standout more to the audience. The word ‘Saving’ in the title were written in bold to signifies that the movie is about 'saving' somebody. Under it was a sentence 'the mission is a man'- this implies to the audience that there is a mission in the movie and add on to the idea of 'saving' somebody in the title by saying that the mission is acutally a 'man' which is possibly one of the guy in the portrait above. 

The production name of 'Steven Spielberg' were written in another unique font to also make it standout as there are many Steve Spielberg fans out there which might grab their attention to watch this film. The bottom centre of the poster is a release date which tells the audience when the film is releasing and that is quite an important thing to have in a movie poster.


Tuesday, 15 September 2015

Kill Bill Opening Sequence Analysis

Kill Bill Opening Sequence Review by Chris


The opening sequence of the movie “Kill Bill” used many interesting techniques to keep the audience excited and interested in the movie; such as the soundtracks, camera angles, effects and monologues which sets the tone of how the plot would be for the rest of the movie. 

The first few seconds, while the directors and the actors were being introduced with pure black background, the sound of a girl breathing heavily and constantly- kind of sexually was played in the background. This makes the audience curious and excited of what is actually happening behind the black screen and it grabs the audience attention because it sounded pretty erotic.

Right before the first scene was introduced, the sound of a man walking in boots, slowly stumping on the wooden floor was played. This technique is really interesting because it just shows the sound without any scene or acting along with it, which makes the audience even more curious about what is happening and want to continue watching- it also creates tension because the noise of the boots stumping on the floor often refers to mysteriousness or hinting that something is about to happen.

The movie opened with a brutal and gruesome black and white close-up scene of a women lying on the floor covered by plastic sheets covered in blood with her face painted with blood and wounds as if she was hurt and tortured really badly- which is totally opposite to what the audience’s idea of the erotic voice. The heavy breathing turned out to be the character’s struggle to breath which indicates that she was scared and in pain. This grabs even more attention from the audience as it shows some kind of a twist already so early on in the movie which makes the movie seem even more excited. The scene was also in black and white which might refers to the fact that it is in the past and the settings might be many years ago.


The shots then changed to the angle of the back of the man’s boots, which was the source of the stomping sound, walking slowly. The boots were leathery and shiny which gives the audience the idea of this character being porch and kind of rich. This creates tension and makes the audience curious about who he is and what is he about to do to the other character.

The women then sees the man walking towards her and began to be scared which indicates that he was the one that caused her all these wounds and tortured her. The man leaned towards her and started speaking in a really deep and manly voice which give the audience a feeling of power and strength. He began to wipe the blood out of her face with a napkin with the word “Bill” on it- this shows that he could be a psychopath or some kind of a maniac because he was talking nicely and trying to clean her face up after he tortured her. The word “Bill” on the napkin reveals that this man is the main character in the movie and gives an idea of what the movie is going to be about. This scene also shows that he was wearing a suit and a few jewelries in his right arm which indicates that he is rich and grown up.

The introduction ended with the sound of him slowly reloading his gun (without any actual visual gun in the scene) while the camera was focused on the girl’s face being frightened followed by a loud bang of the gunshot and the visual of blood splashing into the plastic sheets and a hole in her forehead. The fact that this whole time, the camera was focused on the girl’s face makes the audience feels really into the scene and shows how that character is feeling. It also makes the audience excited of who this man is as it never shows how he looks like or anything, only a his shoes and the suit on his arm. After he pulled the trigger and killed her, it shows the audience that this character is a murderer and the fact that he does it so calmly and casually makes it seem like he has done it many times before and this movie is based on this cold-hearted psycho serial killer- this is the reason that will make the audience interested and want to watch on because this character is really interesting and unique from other movies.


"Blitz" Thriller Opening Sequence

Biltz

The thriller opening sequence I'm analyzing is called "Blitz" and I'm reviewing how the tension were created in the opening scene.

The first few seconds directly indicates that the setting was in WWII because of Churchill's radio broadcast in the background. The first character of a little girl writing on her diary on her small bed was introduced. This creates tension to the audience as who this girl is and why is she in an ancient room with all the war atmosphere going around her- makes her seem out of place and it also makes the audience curious about what is about to happen to her.  The camera then switches slowly to show all the war posters and antiques about the war which confirms with the radio that the setting was indeed during WWII.

Around the little girl were many old stuffed dolls. This indicates that she is still innocent and may have no idea about what is going on in the war- this gives the audience the protective feelings over this character already early on in the scene which creates even more tension to the audience as what will happen to her.

Suddenly the door swung open, revealing the shadow of a man as the little girl hid herself under the her blanket. This indicates that she was frightened and scared- creates tension and curiosity to the audience as what will happen to this little girl and who that man is. The fact that she was scared of him might mean that she doesn't know him and that he could be a dangerous/scary character that is about to do something to her.

The transition of "60 Years Later" indicates that the rest of the film might be set in the present after what happened to the girl during the war. The scene then shows a man (archaeologist) who discovered the room. The whole scene was dark and the only source of light for that man was his flashlight- this builds tension of mysteriousness and spookiness as it is really dark and darkness often refers to horror. The camera then focused on an ancient scary toy which fell down on the floor and faced directly into the camera- this creates a scary atmosphere as the toy looks really old and terrifying, it makes the audience feels like they are in the scene as it makes them feel involved.

The rest of the scene was in silence which creates even more horror atmosphere. Then there is suddenly a black shadow that flew passed the screen- this generates tension to the audience as they want to know what that shadow might be and it also creates tension because the audience doesn't know what is going to happen next.

The opening sequence ended with a jump-scare of a guy in a gasmask- staring directing into the camera as the archaeologist shined his flashlight into the gas mask's face. This creates tension to the audience as well as giving them the first impression of horror which sets the tone of how the film is going to continue for the rest of the movie.